
You can create a menu to aid users navigate your website. In order to create a menu, you will have to create Menu groups.

1. Go to Manage
2. Menu
3. Click on the + icon next to Menu
4. Create menu groups
Below are the Menu group details:
1. Default: Displayed on the Main Header and sidebar menu. As the name suggests, this is the fallback menu if nothing else is set. The first menu group created for all sites is the default and the slug for the Default menu group is default.
2. Secondary menu: The menu will appear next to the logo. This is applicable only if you use a two-header style on Page Builder. The slug for the Secondary menu group is secondary-menu.
3. Sidebar menu: This is the menu under the hamburger. Also, you can use this menu group to override the default menu appearing on the hamburger menu. The slug for the Sidebar menu group is sidebar-menu.
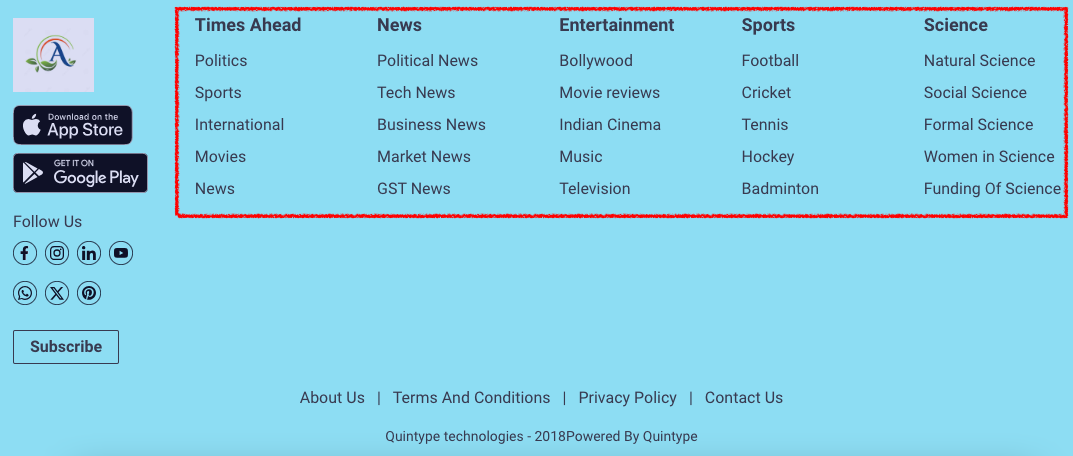
4. Footer: Menu that appears at the bottom of the page(static pages like About us, Terms and conditions etc). The slug for the Footer menu group is footer.
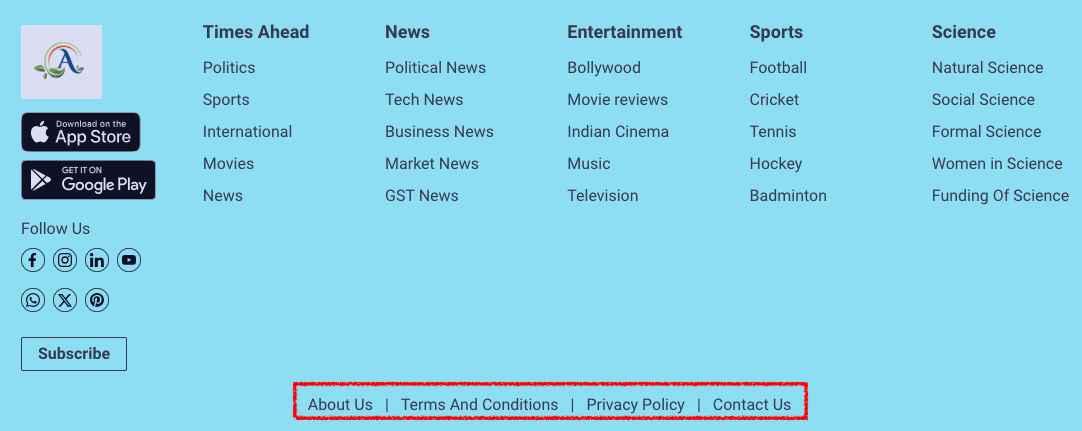
5. Footer Site links: These are the specific subset of links that are typically found within the footer. The slug for the Footer site links is footer-site-links.
Note: Please don't create a menu group with a random slug. Creating menu groups with random slugs does not work. We will not be able to delete the menu groups from Bold.
Here is a video tutorial on how to generate menu groups and menu items.
Creating the Menu:
- Go to workspace> Manage > Menu
2. Select the menu group
3. Add item
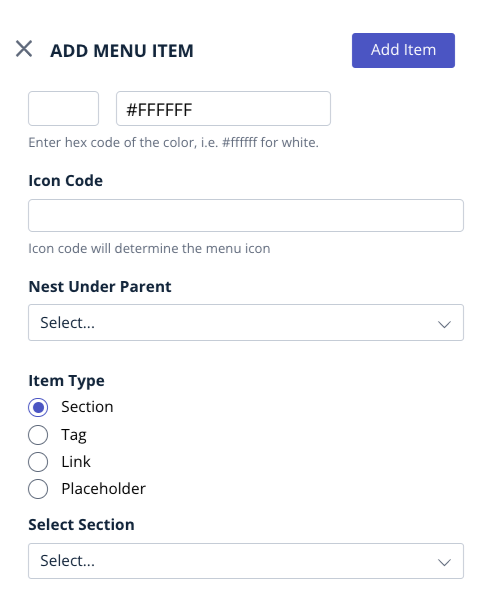
4. Enter the details:
a. Name: The name to be displayed on the website.
b. Color: The color of the font in hexadecimal numbers.
c. Select Parent Menu Item: The parent menu item name, if a nested menu item is required.
d. Item Type: Determines if the new menu item is linked to a section, a tag, or a URL.
e. Section: Creates a link to the selected collection section. Select the required section from the select section.
f. Tag: Creates a link to the existing tag. Select the required tag from Select Tag.
g. URL: Creates a link to the specified URL. Enter the URL.
h. Placeholder: Creates a menu item without an associated link. Use this to indicate a category name and anchor sub-menu items.
5. Click Save Item.
You might also find it interesting to learn how to create a section.