
The following instructions have been tested and are correct as of December 2018. Facebook does change its processes from time to time and might make changes to this process in the future. If you encounter such a problem, please get in touch with the support team.
Also note that the Facebook Team approving the addition of your feed to Facebook Instant Articles, is completely subject to your compliance on multiple parameters that are not controlled by Quintype and the approval process itself will have an unpredictable timeline.
Setting Up
- Sign up at https://instantarticles.fb.com An existing Facebook page is required and Admin privileges to it as well. Once registered for Instant Articles, choose the Facebook page to be connected.
- In the page ‘Publishing Tools’ the left panel will have the Instant Article settings listed, which will contain configuration instructions and settings.
- Connect the website to Instant Articles to authorize its access by listing the URL and adding the required code to the HTML header tag of the website. (This will be handled by Quintype). Eg: Refer the below screenshot Once this is complete, a message will be displayed stating that the page has been successfully connected and that URLs can be added.
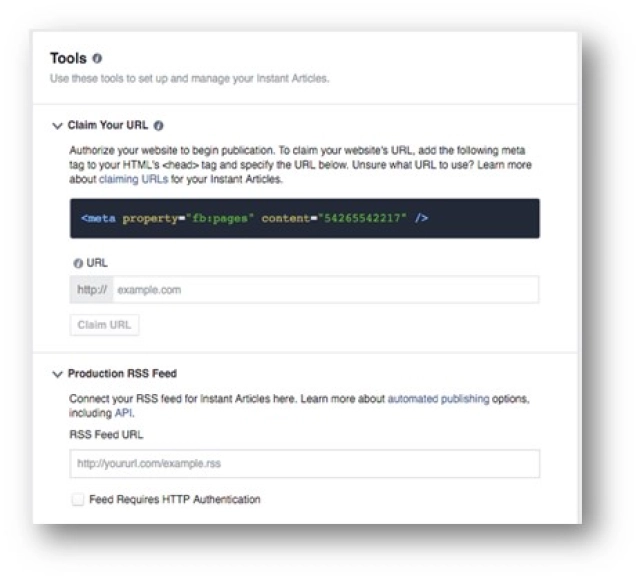
- Add the Production Instant Article RSS feed link, through which Facebook can retrieve data to be cached for the Instant Articles. This is structured as: https://your-website.com/api/instant-articles.rss
- {This step is Optional} A Developmental Instant Article RSS feed can also be configured, this can be viewed from the Page Manager mobile app, in order to see how the Instant Article feed looks like before public deployment.
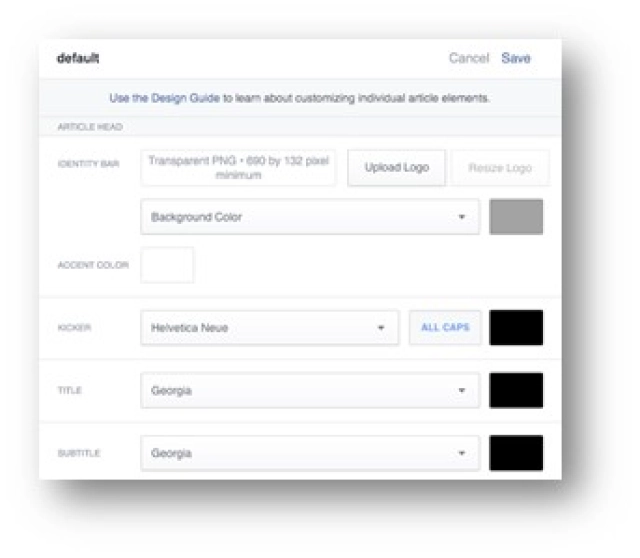
- The style that the Instant Article will be displayed on the Facebook app can also be customized. This can be done from the Styles tab under 'Configuration'. The Default style is what is applied to all articles if no modifications are done.
Each style has 19 individually customizable design elements, including font selection, colors and layout preferences.
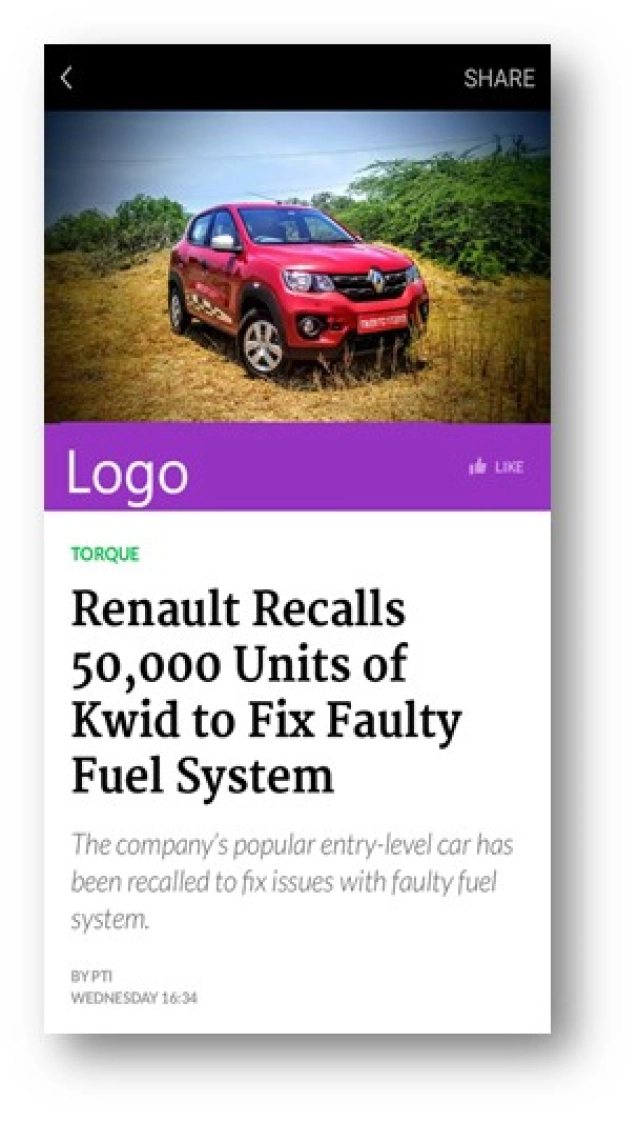
- Header Art - An Image, video gif or slideshow which is in a 4:3 aspect ratio
- Logo - on a customizable background
- Like button - Compulsory for all pages, color can be customized but will not be seen by users who have already liked the page.
- Kicker - An optional element right below the logo bar
- Title - The title of the article that is compulsory
- Subtitle - An optional element that is customizable, placed below the title.
- Byline - A compulsory element that consists of author name and date.
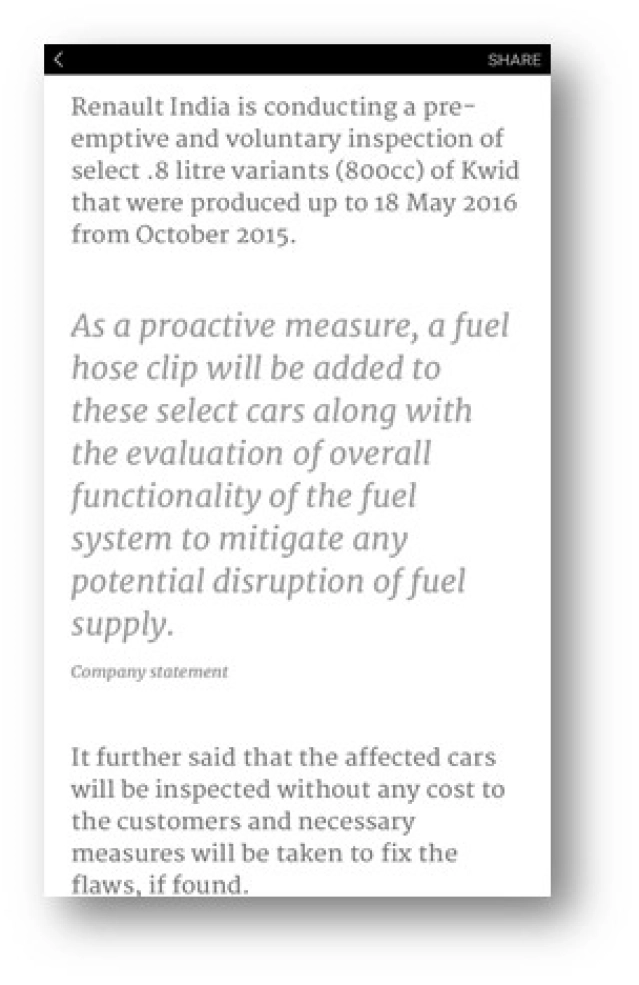
- Body Text - Typeface and color can be customized.
- Inline Links - Links that are placed in the body text.
- H1 - A large Header with customizable typeface and color.
- H2 - A small Header with customizable typeface and color.
- Pull Quote - A piece of highlighted customizable text in between the body.
- Pull Quote Attribution - An optional attribution that is placed below the pull quote. The font style is fixed.
- Block Quote - a block of highlighted text in between the body that inherits the same style as the body except that
- Caption Title - The title of the caption which can be in S,M,L,XL sizes can be placed below, above or on top the image.
- Caption Description - A description of the image can be placed independently on top, above or below an image, it can be in S,M,L,XL sizes.
- Caption Credit - Optional text under the description can be placed below, above or on top the image.
- Footer - Typeface can be customized, the color is grey by default and the text size is fixed.
- After changes are made they must be saved and can be previewed through the Pages Manager app (Download it for iOS or Android if you don’t have it already).
- To change the color of any section, click on the color box and then enter the hex code for the required color.
- Currently, only Helvetica Neue and Georgia font families can be used in the design style for Instant Articles.
- Instant Articles can be managed from the Production Articles section of the publishing tools of the page.
- Monetization on Facebook Instant Articles can be managed through the configuration section. There are two major types of Advertisements that can be provided:
- Direct Ads, or ads that are chosen by the publisher,
- then there are Audience Network Ads, which are Ads that Facebook will place within the Instant Article on its own and then give the publisher revenue generated. The Ads can be either automatically placed throughout the Instant Article or they can be manually placed within the article.
- Set up an Audience Network account using the Monetization wizard.
Only after 5 articles are published will Facebook review the page and only after that will the option to publish Instant Articles be available.
- {This Step is Optional} Install the pages manager app for [Android] or [iOS] to view the instant articles that have been published both on the production and the development stream.
- Below is a typical e-mail a publisher receives:
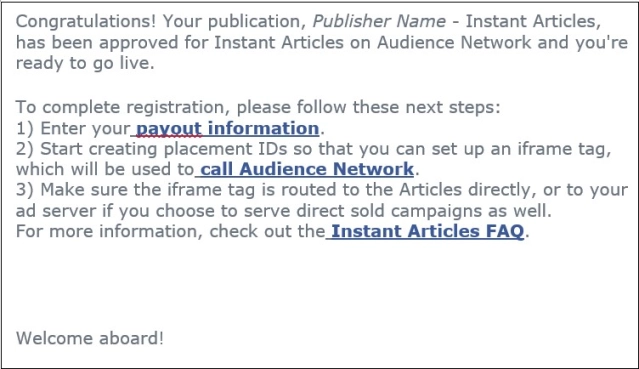
- After you add the payment information, Facebook will provide the publishers with the iframe tag.
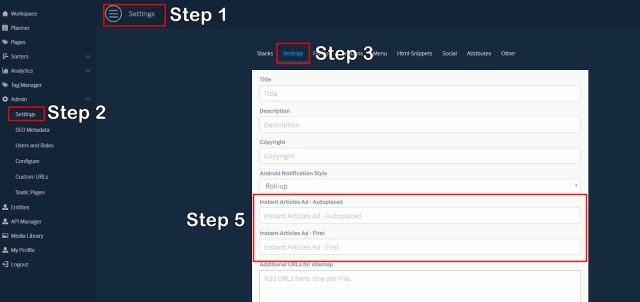
- This tag needs to be added to Editor -> Admin -> Settings -> Instant article Auto placed.
- It will be similar to the details below (Below are example URLs that show the structure)

For more information:
[Instant Article RSS feed]: https://developers.facebook.com/docs/instant-articles/guides/articlecreate#howto-format
[Instant Article API]: https://developers.facebook.com/docs/instant-articles/api
[Quick Start for Website]: https://developers.facebook.com/quickstarts/?platform=web
[App Dashboard]: https://developers.facebook.com/apps/
[Android]: https://play.google.com/store/apps/details?id=com.facebook.pages.app&hl=en
[iOS]: https://itunes.apple.com/in/app/facebook-pages-manager/id514643583?mt=8