
Web Stories are a web-based version of the popular "Stories" format that blend video, audio, images, animation, and text to create a dynamic consumption experience. This visual format lets you explore content at your own pace by tapping through it, or swiping from one piece of content to the next.
Please click here to serve ads on Visual stories
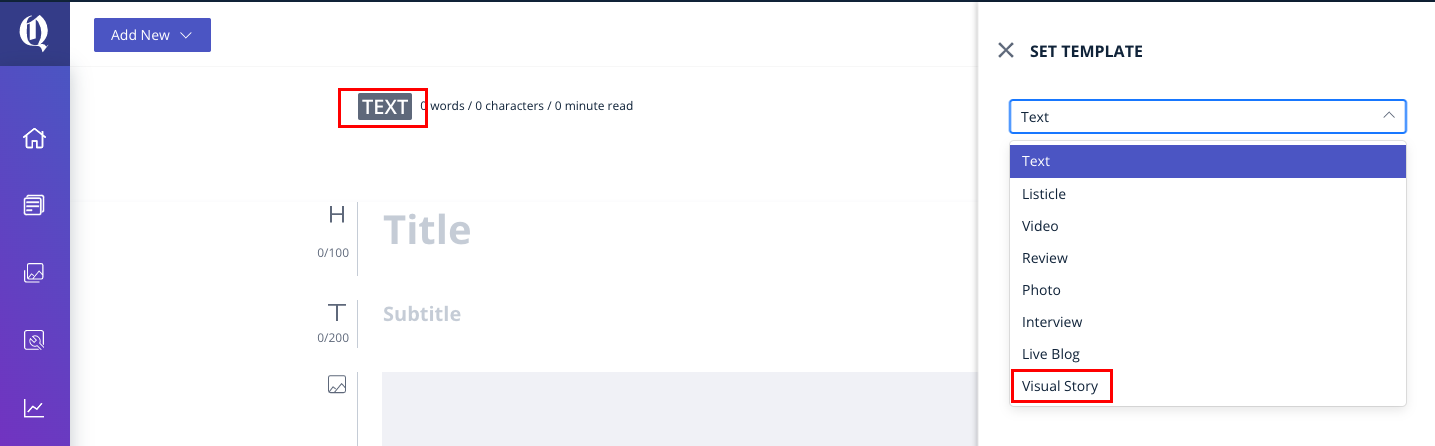
Steps to create the visual story:
1. Log in to the CMS
2. Select “Story” from Add New dropdown

3. Click on the text and change the story template to a Visual story (By default it will be a text story)
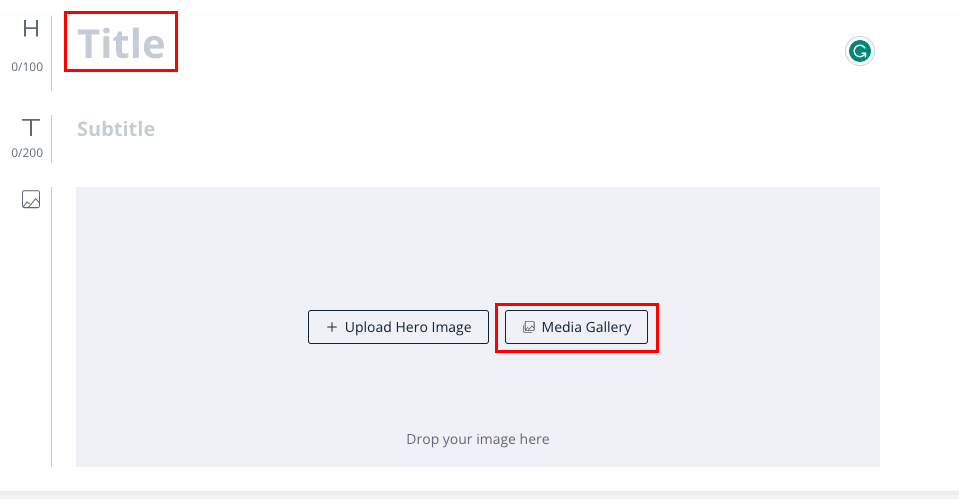
4. Please enter the title along with the hero image. This will be the first card of the story.
5. Now click on “Add New Card” button.
6. Now click on the “+” icon to select the image element and upload the image. Select the text element if you would like to add text about the image.

6. Keep adding cards by clicking on “Add New Card” and publish the story.
CTA: Call To Action Button
A call to action (CTA) is a prompt on a website that tells the user to take some specified action. A call to action is typically written as a command or action phrase, such as ‘Follow’, ‘Subscribe’ or 'Sign Up' and generally takes the form of a button or hyperlink (redirection to another page)
Steps to add CTA button on Visual story:
1. Click on “Add New Card”
2. Select the CTA option from the story elements

3. Enter the CTA text to be displayed on the frontend like: About us, Know more, Subscribe, Read more, Follow us, etc
4. Enter the redirection URL where the page needs to be redirected.
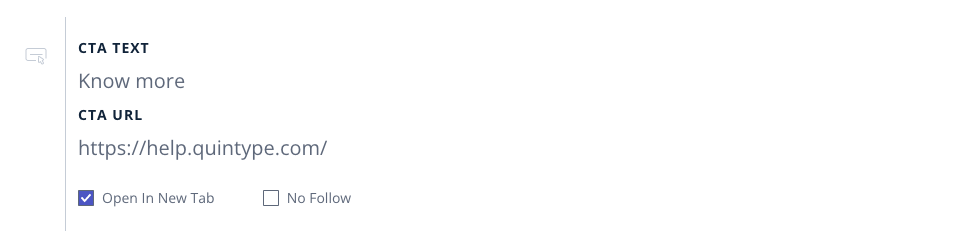
5. Please tick the open in the new tab check box to be opened in the new tab
Steps to add Logo to Visual stories:
1. Upload image in media gallery (CMS - Bold)
2. Copy the image URL from the media gallery once the image is uploaded
3. Go to Bold settings > configure > amp
4. Enter the image URL in the Logo field under "Others" and save the settings.
The daily sitemap includes visual story URLs
The daily sitemaps generated by Bold now include the visual story URLs in addition to the regular story URLs. These are included in the index sitemap which is at /sitemap.xml
Bold Release Note - 6 June
Enhance your visual stories with video content by uploading videos from your system to Bold.
Maximum size: 60 MB.
Supported format: MP4.
Please get in touch with [email protected] to get more details on this feature.


