
Usecase:
A live blog template can be handy when there are any current events happening and you wish to create a story around the event while it is occurring.
Example: A cricket match, election results, verdicts of important cases.
Workflow of a live blog:
A live blog follows a different workflow when compared to other story templates.
Here is how a live blog is different from other story types:
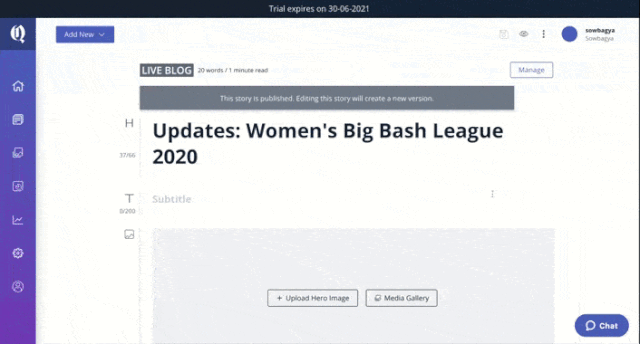
- The first time a live blog is being published, the story will go through the standard approval process that is implemented on your website.
- Once a Live Blog is published, any edits you make on the story will only require a simple Save action for the newly added content to be made available to readers of the story.
- You may choose to close the live blog after the event you are reporting is completed.
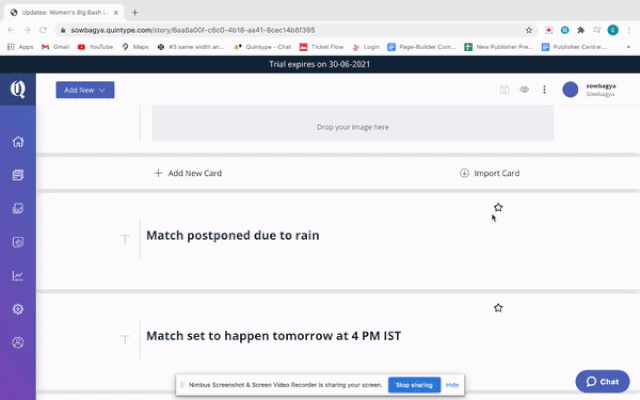
- A Live Blog is populated in reverse chronological order, meaning that each new card you add is placed in reverse chronological order immediately below the Header card containing the Title of the story.
- Cards in the story continue to be displayed in this order as long as the story is live.
- Once the story is Closed, the cards are reordered in proper chronology.
- Another important thing to note, is that if a card is pinned - that card will always be displayed immediately under the Title card, irrespective of its chronological order. This override continues even after the story is closed.
- In addition, each new card that is added also has a title container and a "This is a key event" box that can be switched on or off to highlight content in that card.
How To Create A Live Blog?
Choosing the template:
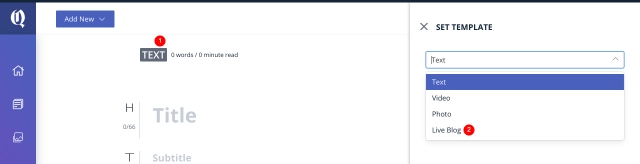
- On the dashboard, click on Add New->Story.
- On the new story page, click on the Text option on the top left corner.
-
Choose the template as Live blog from the resulting popup.
Adding cards to the live blog:
As mentioned before, the live blog follows a reverse chronological order.
This article displays an example of a live update about a cricket match.
Here is how the cards can be added and how they are reflected on the website:
- On the bottom of the story, click on Add card button.
- Add a few cards with the necessary content, save and publish the content.
reopened
Note
The blog goes through the publishing process only on the first time. All changes done after the initial publish are immediately reflecting on the story in the frontend.
Adding key events:
If you wish to highlight any of the important events that happen, you could do so by marking that particular card as a key event.
Here is how to add a key event on a live blog:
- Clicking on the star icon next to the particular card on your live blog makes it a key event.
- There aren't any limitations on the number of key events that can be added to a live blog. Any number of key events can be added to a blog.
- Key events would appear on the right corner below the blog's title.
-
When a card is marked as a key event, the title of the card and the time when the card is added shows up on the key events section on the front end.
Pinning cards to the blog:
- Important information that shouldn't be lost in the trail of cards added to the live blog, you can pin that card to the top.
- This can be done by clicking on the pin symbol next to a particular card.
- Pinning a card works similar to pinning comments on any YouTube video.
- The pinned card stays on top of the blog even after the live blog is closed.
Closing a live blog
When the live event you are covering is over, the live blog can be closed.
Closing a live blog re-arranges the cards in the chronological order in which they were added while the blog was created.
To close the live blog:
On the top right corner of the live blog click on the three-dotted menu and choose close.
Note
Once a live blog is closed, it cannot be re-opened.
Bold Release Note - 9th April 2025
[27 March] Enhancement: Event timestamp for liveblogs
Editors can now add a specific event timestamp for the individual updates in a live blog. The timestamp can be consumed by the front end through the APIs so that it can be displayed on the live blog story pages.
