
In this guide, we'll integrate Twitter with our CMS to enable automatic posting of articles on Twitter whenever we publish a new story. Before proceeding with the setup, make sure you already have a Twitter developer account. Let's get started!
In order to set up a Twitter auto-post, you need to follow below steps:
Step 1: Create a Twitter Project and App
1. Go to the Twitter Developer Dashboard:
- Head over to the Twitter dashboard.
- Click on “Projects and Apps.”
- Select “Overview.”
- Click on “Create Project.”


2. Enter Project Details:
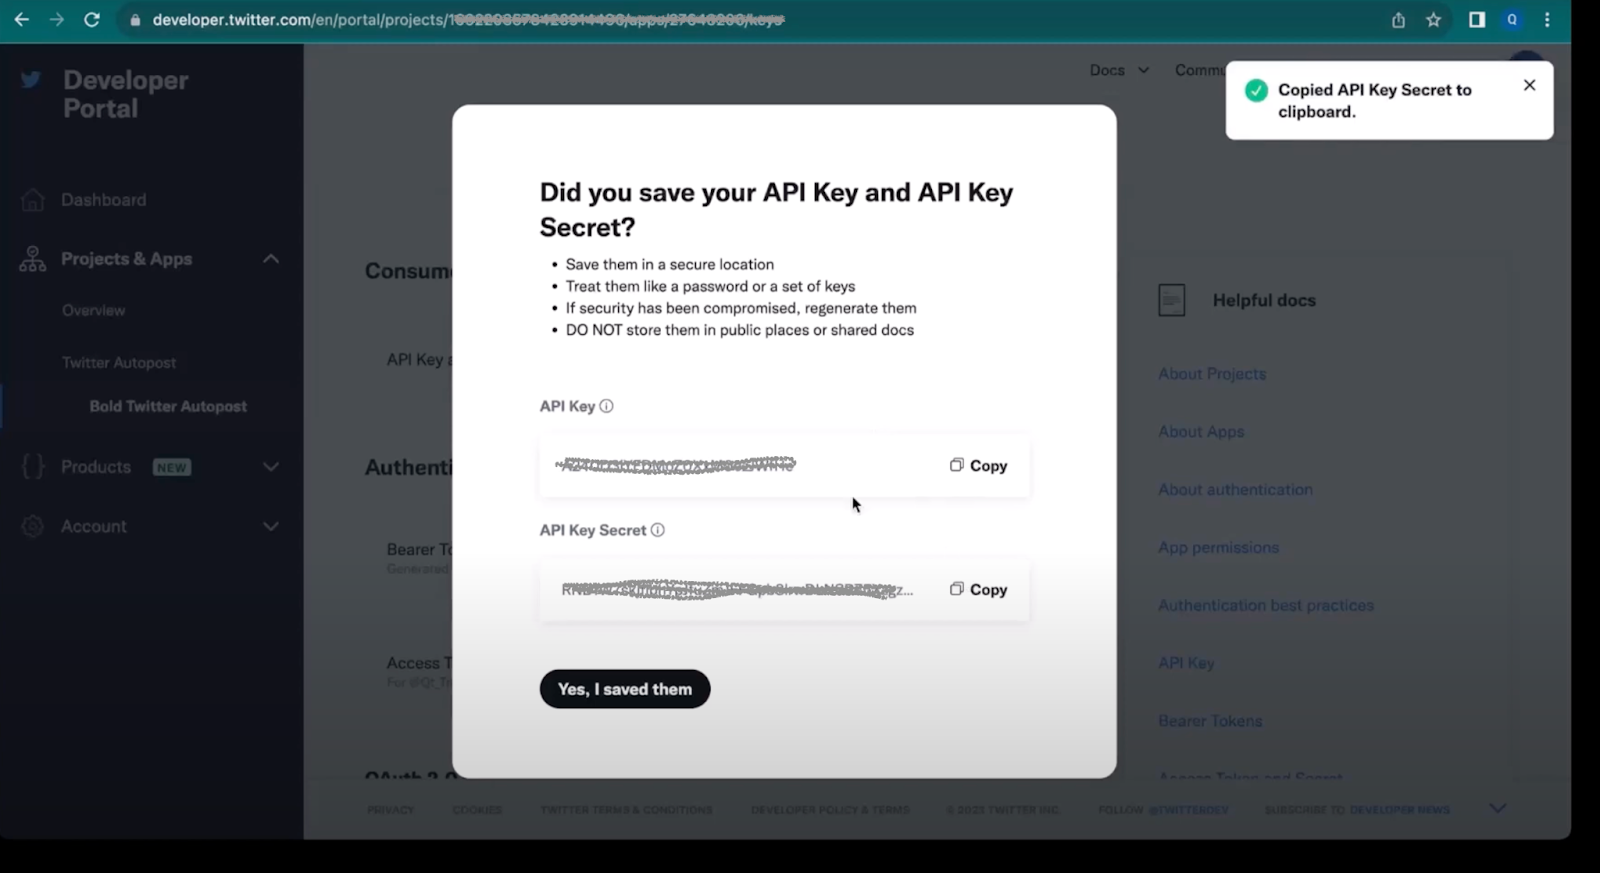
- Provide the required details such as the project name, use case, project description, and app name.
- This will generate an API key and secret key. Keep these handy for later use. You may copy this in the sticky notes.

3. Customize App Settings:
- Click on “App Settings.”
- Customize the app name, add a logo, and provide a description under app details.

4. Set Up User Authentication:
- Under "App Permissions," select "Read and Write" and "Post Direct Messages" permissions.
- Under "Type of App," select "Web App," "Automated App," or “Bot.”
- Enable three-legged OAuth and enter the callback URLs in the following order:
- Site URL/admin/social/callback
- Site URL/twitter/callback
- Site URL/oauth (for web app or front-end login)

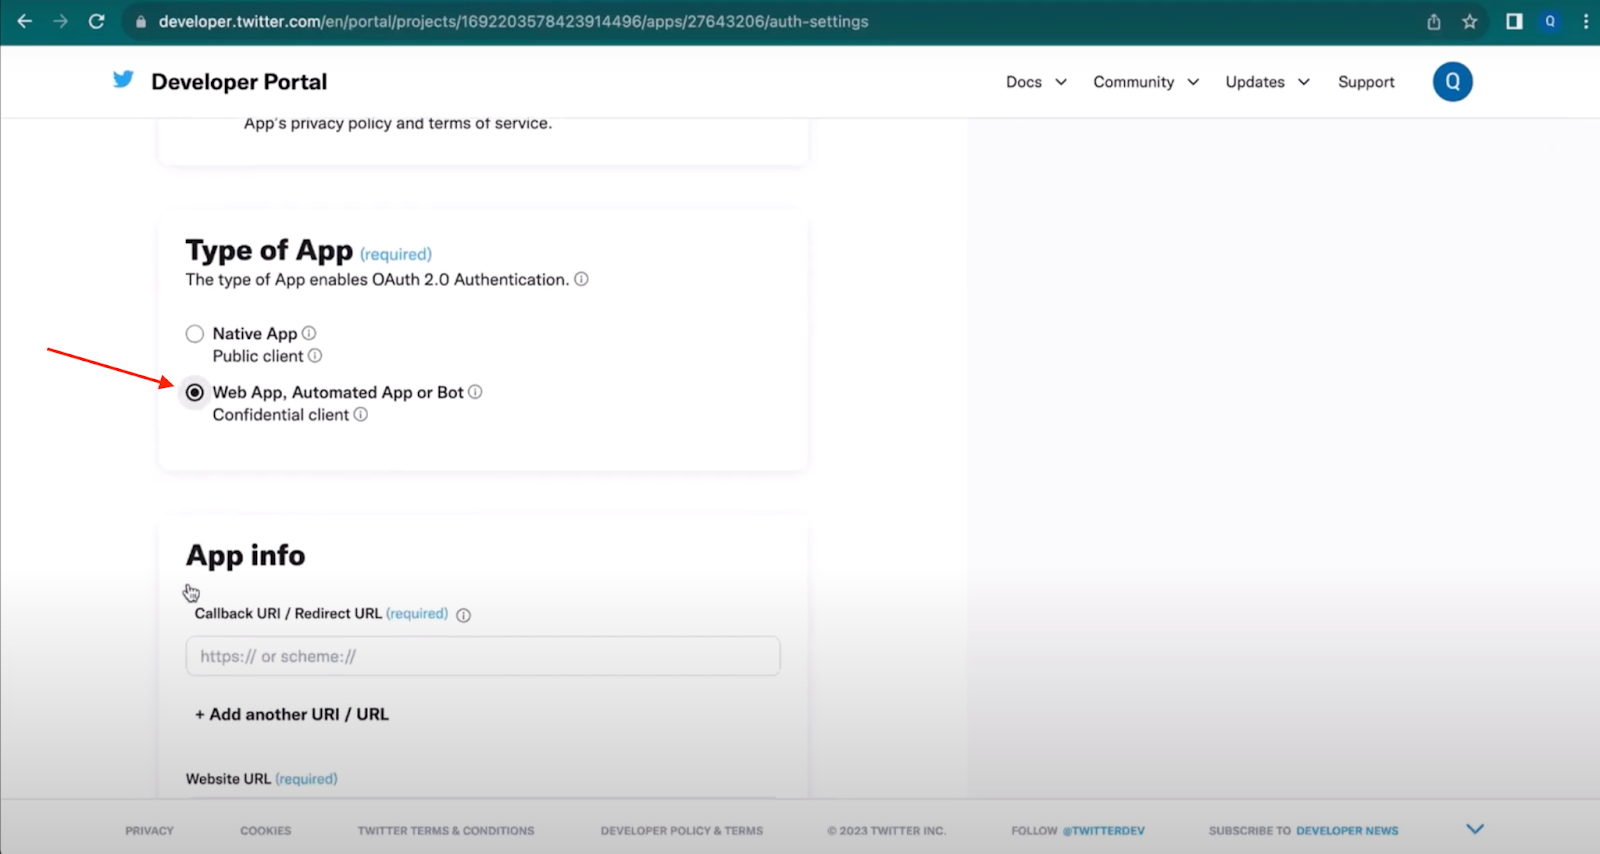

- Add the site URL and optional details where applicable.
- Click on "Save" to proceed.
Step 2: Integrate Twitter with Bold CMS
1. Navigate to CMS Settings:
- Ensure you have admin access to proceed with the integration.
- Click on "Settings," then “Integrations.”
- Click on "Add Integrations" from the drop-down menu and select "Twitter."


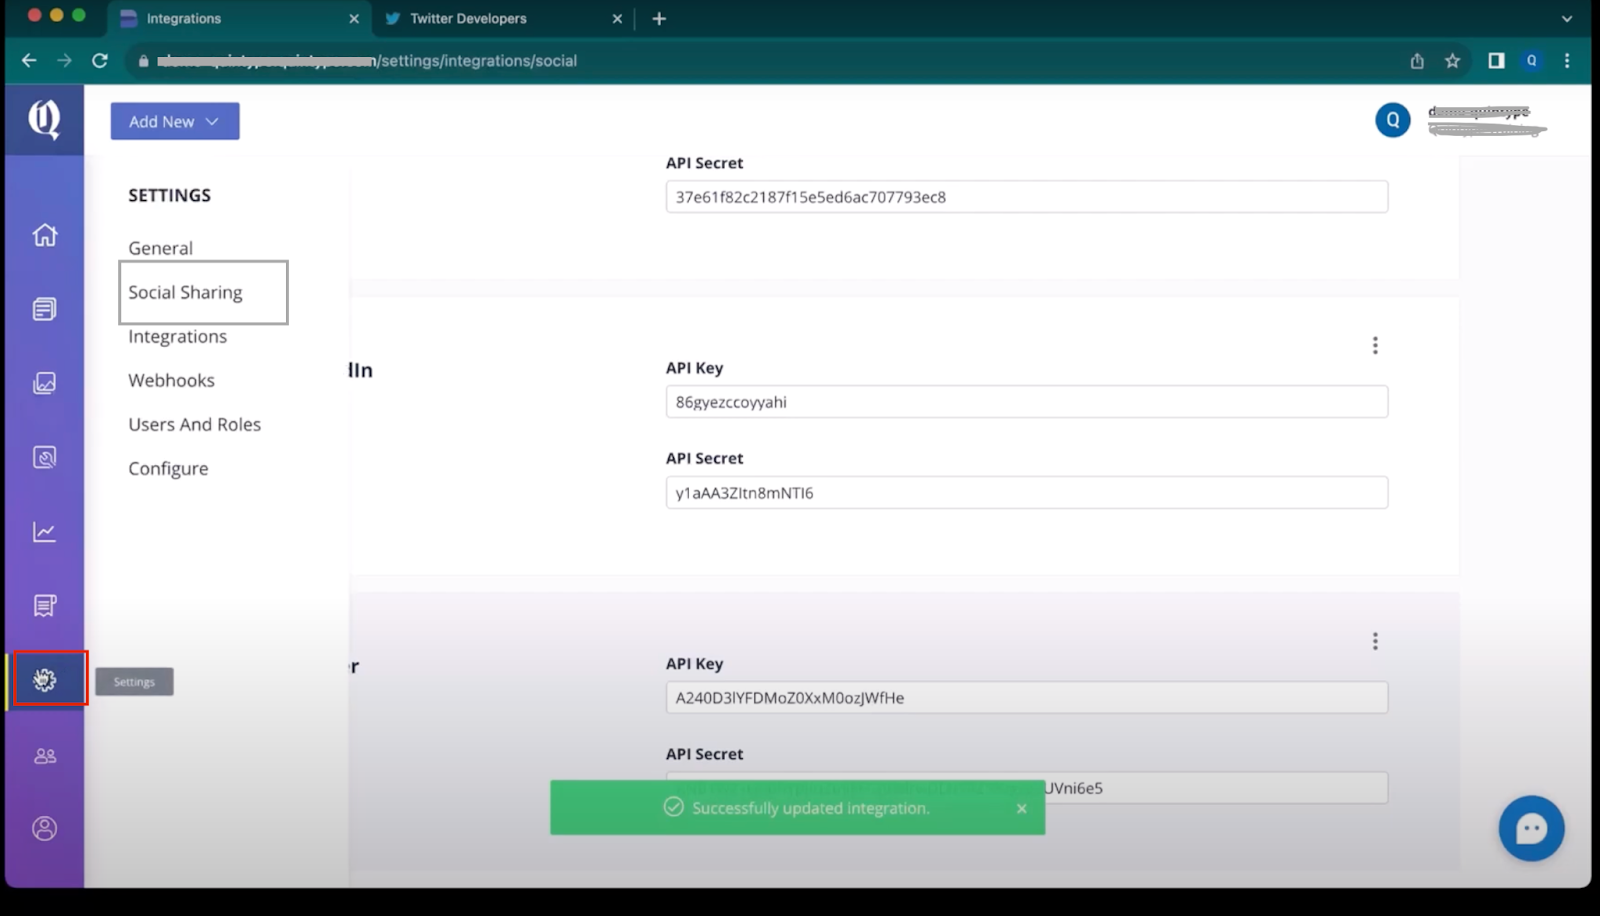
2. Enter API Credentials:
- Paste the API key and API secret key that you generated earlier from the Twitter developer portal.
- Click on "Update" to save the settings.

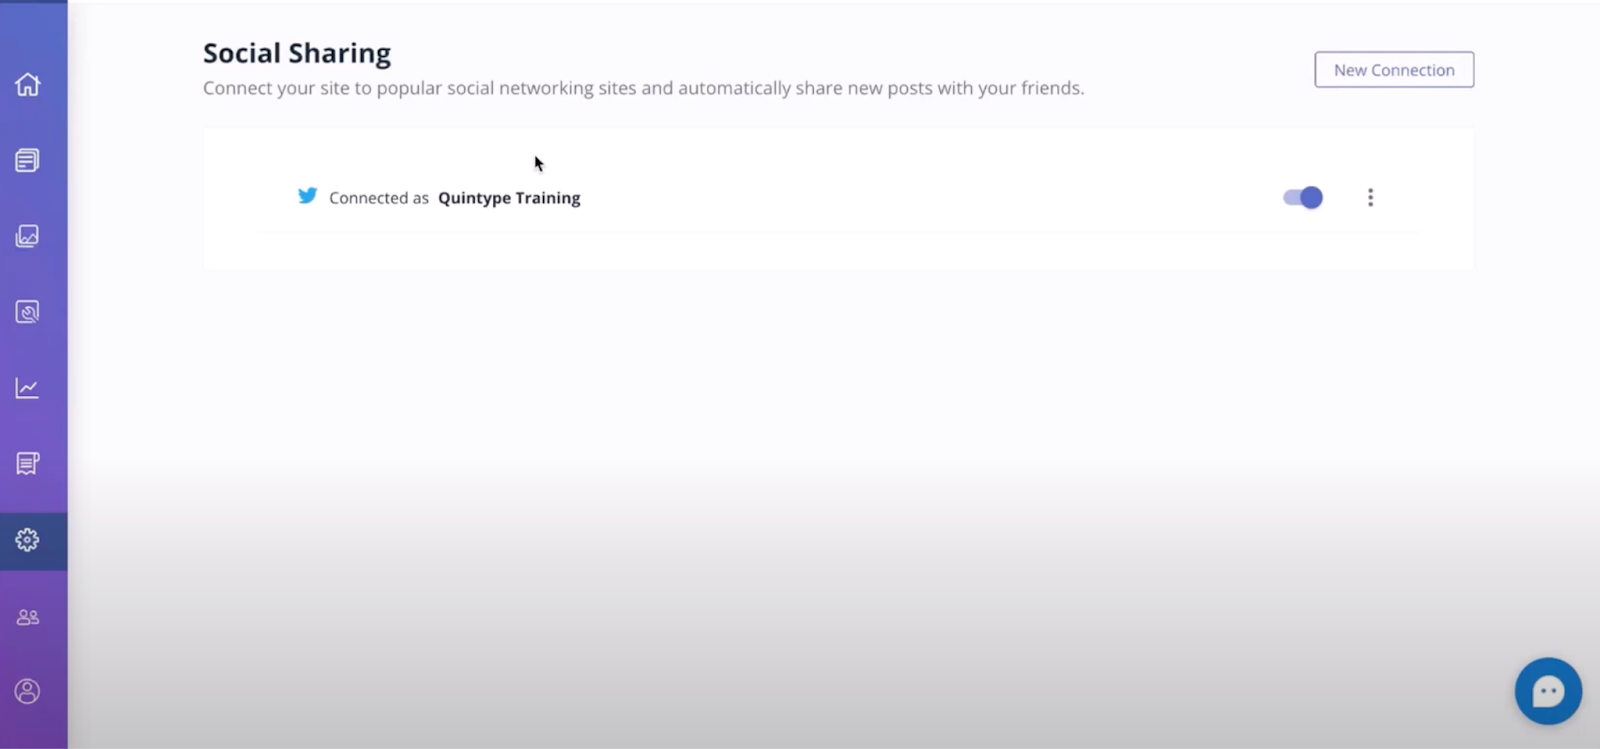
3. Configure Social Sharing:
- Go to "Settings" and select “Social Sharing.”
- Click on "Add New Connection" and then choose “Add Twitter Account.”
- Authorize the app to grant the necessary permissions for the Twitter app to function properly.
- You will be redirected back to the editor, where your Twitter account will be successfully added.


Step 3: Enable Auto-Posting for Stories
1. Open a Story:
- Open the story you want to enable auto-posting for.
- Go to "Manage," followed by “Show Advanced Options.”
2. Add Social Card:
- Click on “Social.”
- Click on "Add Social Card" and add the social share message.
- Check the Twitter account that you're using to auto-post.

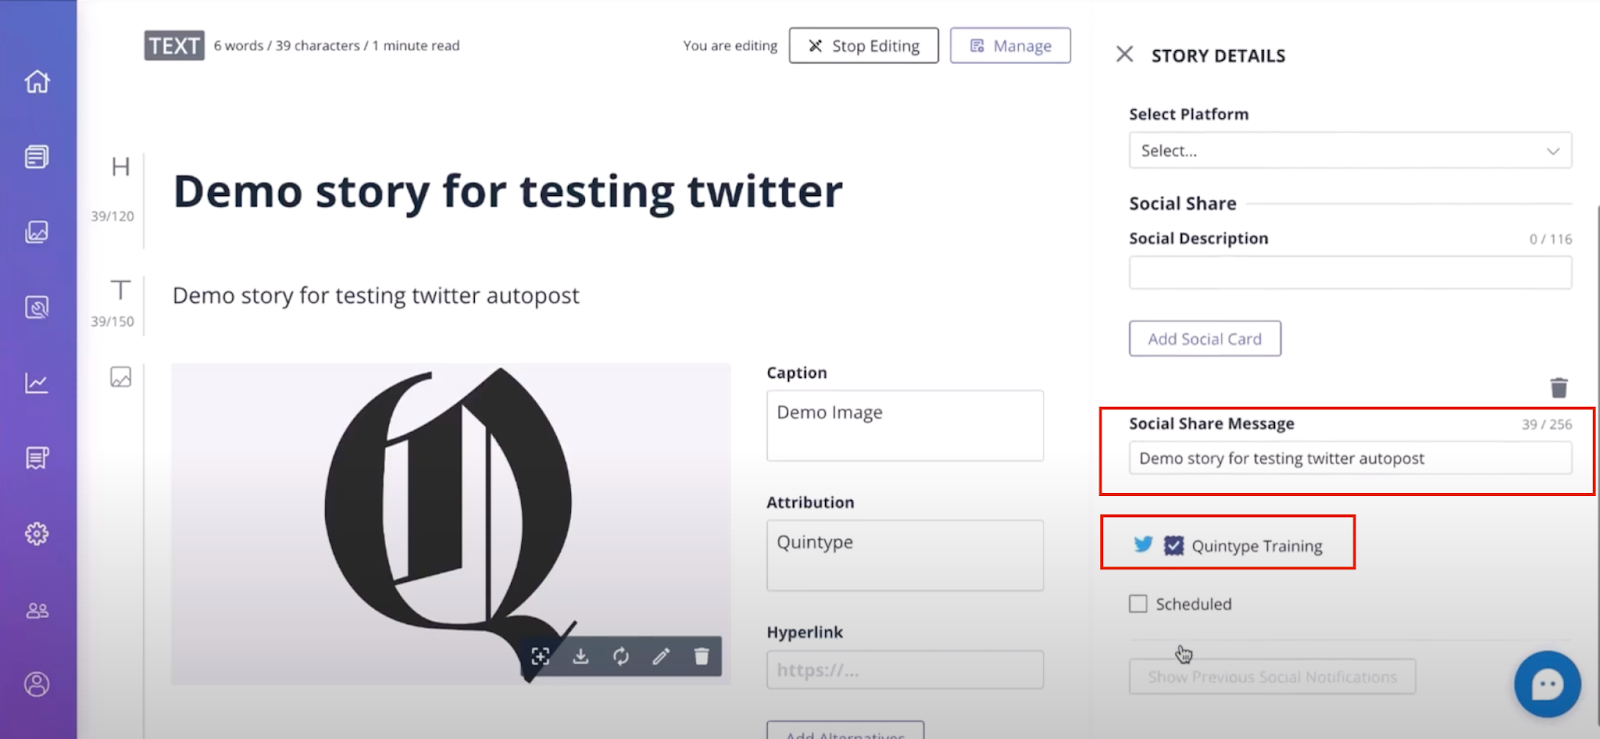
3. Schedule the Tweet:
- You can choose to send out the tweet as soon as the story is published or schedule it for a suitable time.
- Once the story is published, the tweet will be sent out automatically.


Conclusion
And that's it! You've successfully integrated Twitter with your CMS, allowing for seamless auto-posting of your articles on Twitter. This integration helps streamline your social media presence and ensures your content reaches a wider audience instantly. Happy tweeting!
If you have any questions or need further assistance, please feel free to reach out to us at [email protected]
Bold Release Note - 28 July '23
Upgraded Auto-post to Twitter from Bold
Bold now uses Twitter V2 APIs to auto-publish in Twitter.
Some publishers may see that the auto-post fails. These failures may be due to API calls made using standalone apps instead of apps within projects.
Ensure that your Twitter app used for auto-posting using Bold is an app under a project in your Twitter developer account.
For more on Twitter apps: https://developer.twitter.com/en/docs/apps/overview